SimpleNext.js
How to create a responsive horizontal navbar with ant design ( for Next.js and react apps)
Marouane Reda
If you need to understand the basics of Next.js, i recommend this course. (Disclaimer : this is an affiliate link that may earn me a small commission, but with no extra cost to you if you choose to enroll)
Create the top menu
We suppose that the app is created and antd is installed ( refer to this article ).
First let's create our top Menu :
render() {
    const { current } = this.state;
    return (
        <div >
        <div style={{
            float: 'left',
            width: '220px',
            height: '31px',
            margin: '16px 24px 16px 0',
            background: 'rgba(255, 255, 255, 0.3)'
          }} >
          <a href="/"> <Image src={logoPic} alt="logo" />
          </a>
          </div>

      <Menu
       onClick={this.handleClick} selectedKeys={[current]} mode="horizontal" overflowedIndicator={<MenuOutlined />} >
        <Menu.Item key="finance" icon={<EuroOutlined />}>
         <Link href="/finances"> Finances </Link>
        </Menu.Item>
        <Menu.Item key="santé"  icon={<HeartOutlined />}>
        <Link href="/sante">  Santé </Link>
        </Menu.Item>
        <Menu.Item key="apmathsp"  icon={<CalculatorOutlined />}>
        <Link href="/mathematiques">   Mathématiques </Link>
        </Menu.Item>
        <Menu.Item key="autres"  icon={<BarsOutlined />}>
          Autres
        </Menu.Item>

      </Menu>


      </div>
	  );
  }
Here we have created our menu, that will look like this :

Create our mobile menu using Drawer
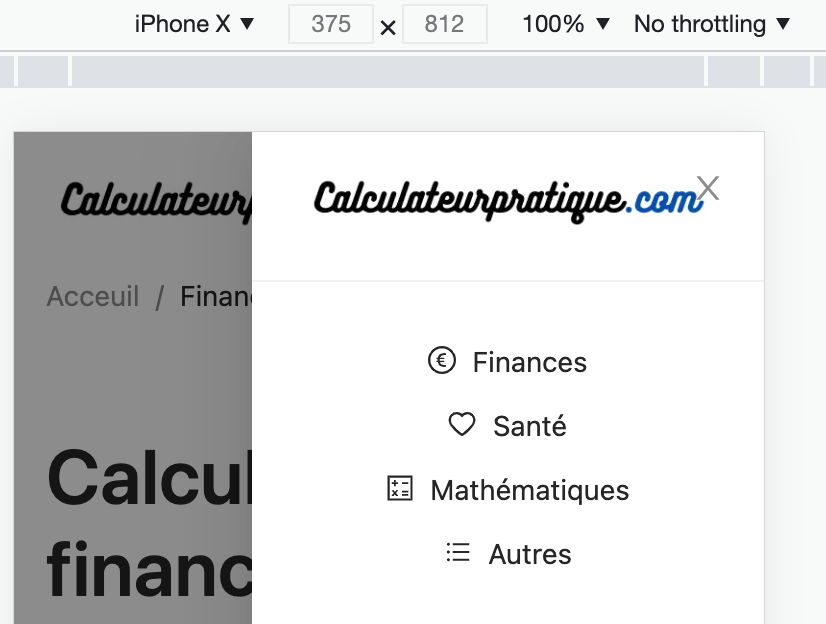
Here we will add our Mobile menu using Drawer :
import { Menu, Typography, Button, Drawer } from 'antd';
import Image from 'next/image'
import logoPic from '../public/logo.png'
import React from "react"
import { EuroOutlined, HeartOutlined, BarsOutlined, MenuOutlined, CalculatorOutlined } from '@ant-design/icons';
import Link from 'next/link';
import styles from '../styles/Home.module.css'

const { SubMenu } = Menu;
const { Text } = Typography;
export default class Topmenu extends React.Component {
  state = {
    current: 'mail',
    visible : false
  };

   showDrawer = () => {
    this.setState({visible:true});
  };

   onClose = () => {
    this.setState({visible:false});
  };

  handleClick = e => {
    console.log('click ', e);
    this.setState({ current: e.key });
  };

  render() {
    const { current } = this.state;
    return (
        <div >
        <div style={{
            float: 'left',
            width: '220px',
            height: '31px',
            margin: '16px 24px 16px 0',
            background: 'rgba(255, 255, 255, 0.3)'
          }} >
          <a href="/"> <Image src={logoPic} alt="logo" />
          </a>
          </div>
          <>
      <Button className={styles.menubtn} type="primary" shape="circle" icon={<MenuOutlined />} onClick={this.showDrawer}>

      </Button>
      <Drawer title={<Image src={logoPic} alt="logo" />} placement="right" onClose={this.onClose} visible={this.state.visible}>
     <div style={{display:'flex', flexDirection:"column"}}>
     <Button type="text" href="/finances" icon={<EuroOutlined />}>Finances</Button>

      <Button type="text" href="/sante" icon={<HeartOutlined />}>Santé</Button>
      <Button type="text" href="/mathematiques" icon={<CalculatorOutlined />}>Mathématiques</Button>
      <Button type="text" href="/autres" icon={<BarsOutlined />}>Autres</Button>
      </div>
      </Drawer>
    </>

      <Menu className={styles.bigmenu}
       onClick={this.handleClick} selectedKeys={[current]} mode="horizontal" overflowedIndicator={<MenuOutlined />} >
        <Menu.Item key="finance" icon={<EuroOutlined />}>
         <Link href="/finances"> Finances </Link>
        </Menu.Item>
        <Menu.Item key="santé"  icon={<HeartOutlined />}>
        <Link href="/sante">  Santé </Link>
        </Menu.Item>
        <Menu.Item key="apmathsp"  icon={<CalculatorOutlined />}>
        <Link href="/mathematiques">   Mathématiques </Link>
        </Menu.Item>
        <Menu.Item key="autres"  icon={<BarsOutlined />}>
          Autres
        </Menu.Item>

      </Menu>


      </div>
    );
  }
}
At this stage we will have both menus appearing, which is not the expected result.
Add media queries to the CSS
In order to hide or show only one of the menus depending on the screen width, we add media queries to our CSS
@media (min-width: 750px) {

  .menubtn {
    margin-top: 20px;
    display: none;
  }
  .bigmenu {

    margin-top: 10px;
    right: 10px;
  }
}

@media (max-width: 750px) {

  .bigmenu {
    margin-top: 10px;
    display: none;
  }
  .menubtn {
    position: absolute;
    margin-top: 20px;
    right: 20px;

  }
}
So if the width of the screen is inferior to 750px, we hide the Top Menu ( so we show only the mobile menu), otherwise we hide the mobile menu.
Final results
Here is the Menu in desktop mode :
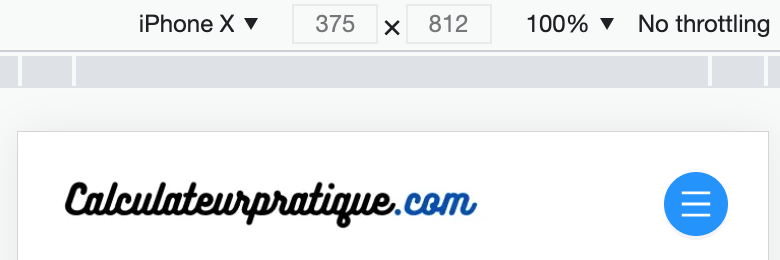
 Here is the Menu in mobile mode :


